    Force Servo upgrade for the Ecilop Easy / Ecilop Stereo with two modified MKS DS8910A+ servos A kit of two modified MKS DS8910A+ servo drives with the Force Servo modification. Designed for Ecilop Easy and Ecilop Stereo drones.
Price € 112 (PayPal. 21% VAT will be applied for EU buyers): Availability: available > Ordering and shipping information
The actual package is as shown in the picture. 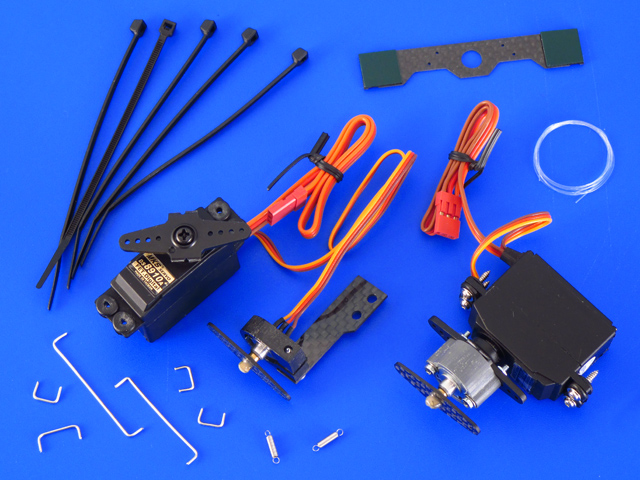 General information about the F-Servo modification for Ecilop Easy. Servo drives must not be enabled until the line is stretched (for feedback) The pull/pull system renders shifts more accurately than a pull/push system. Since the passed effort is very small, a thin line is an optimal choice. No serious tension is necessary, but the line must be stretched. If it's not, the servo drive may vibrate. MKS DS8910A+ servo
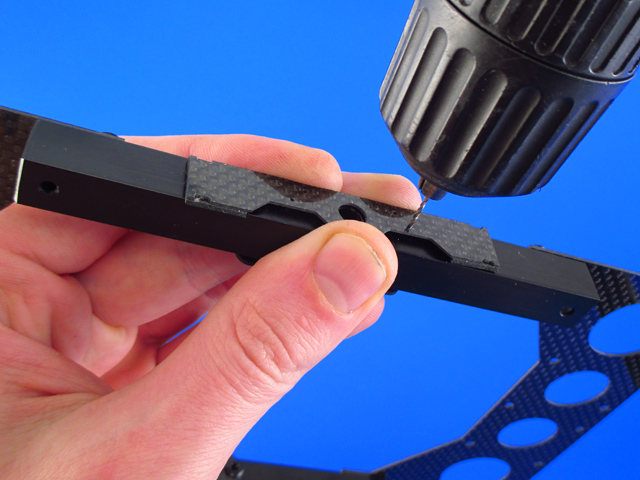
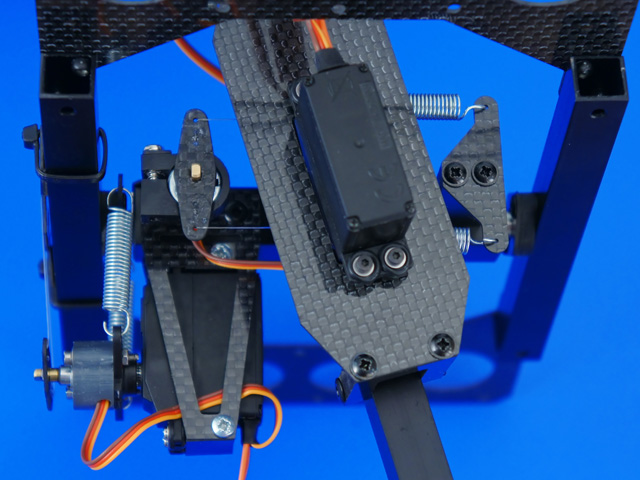
Modified drive installation sequence: 0. Do not turn the servo on until the fishing line is not fixed (p. 4) 1-A. Installation of the Force Servo with a metal rods. Drill a 1mm holes in the equipment frame (if you have an older frame).
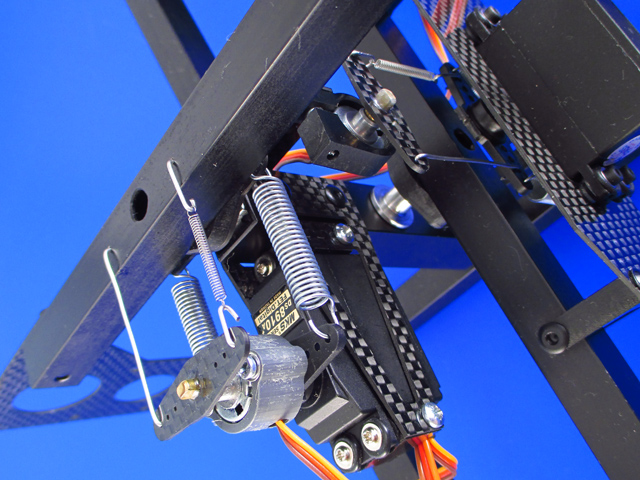
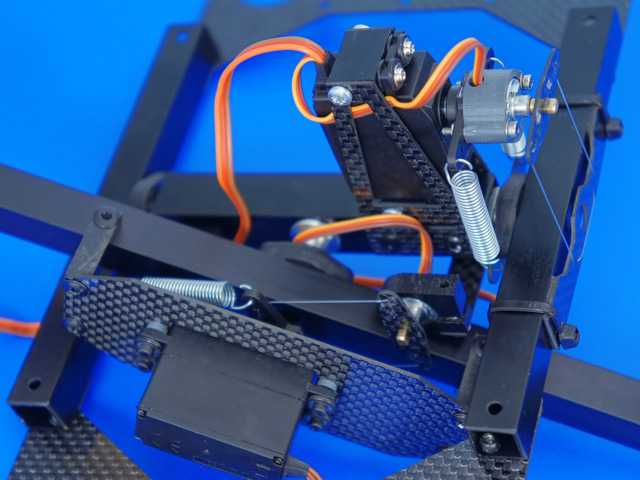
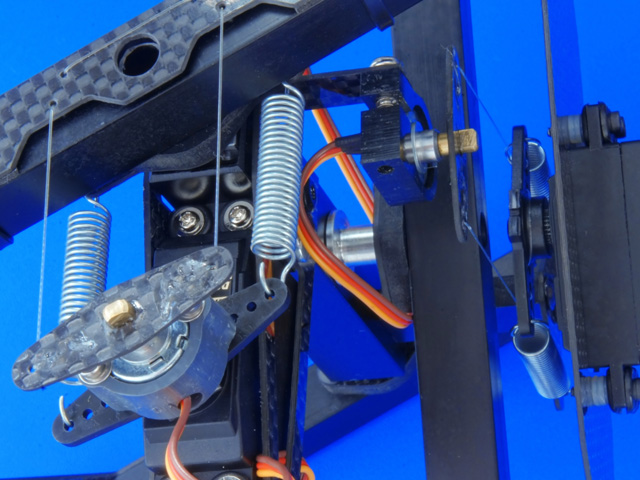
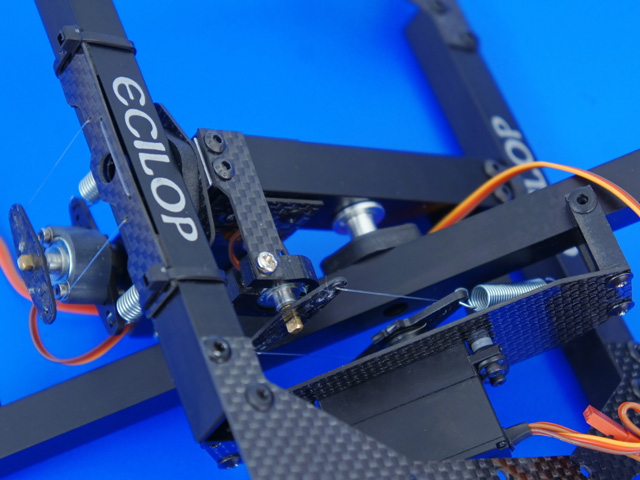
Install all the servos, springs and links as shown. Make sure that all joints can be rotated easily, are not jammed and are not rubbing against each other.
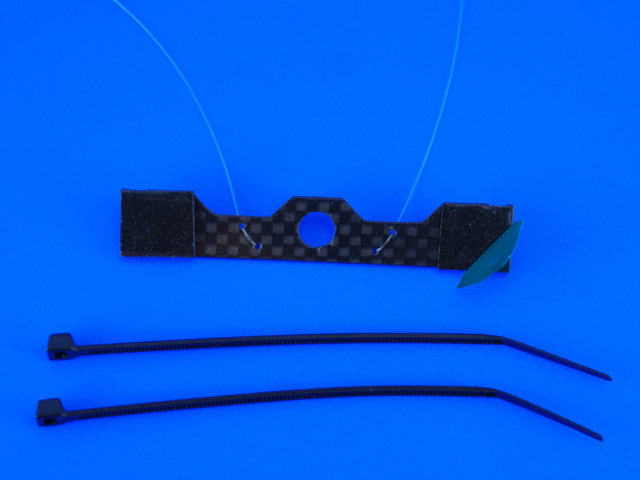
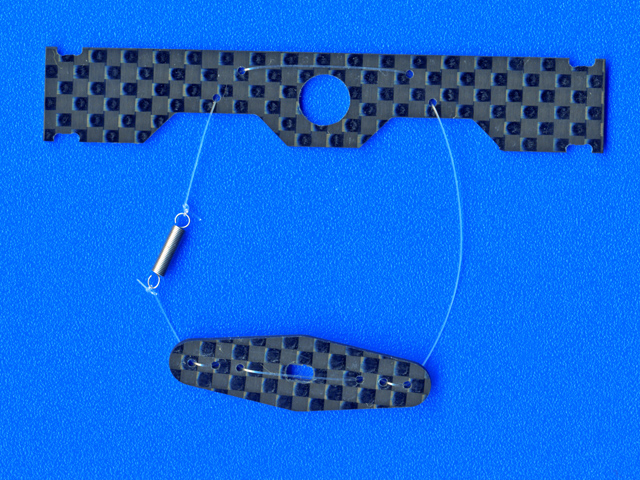
1-B. Installation of the Force Servo with a fishing line (alternative solution). Fasten the line fixture onto the frame..
2. Fasten the potentiometer on the axial block of the Tilt axis.
3. Tie the ends of the line to the spring. The spring is installed only on one side of the arm. The spring must be stretched to be 15-25mm long (free length – 10mm). * With time, the line may stretch and the tension will be gone. To prevent this from happening, you need to install a spring that will guarantee constant tension.
4. Pull the line through the holes in the arms. Balance the potentiometer arm. Tighten the line and secure the loose end with a drop of instant glue.
Force Servo configuration process |